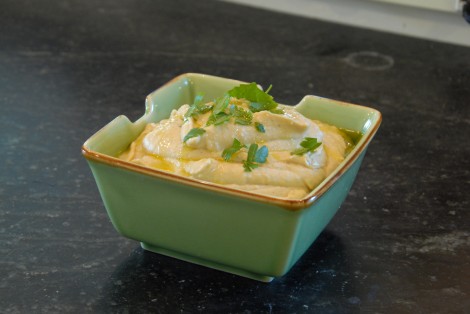
Hummus. It’s taking over the nation. Only a few (ok, maybe several) short years ago if I wanted to buy hummus I either had to go to the nearest organic-food-super-store (which won’t be named), or as a much better choice the Lebanese Taverna Market. Mostly, however, I made my own. I liked the control over the end flavor, and that all the ingredients are readily available at any market — except tahini, which is shelf stable for months if not years.
Now, every grocery store, convenience store and gas station sells hummus-like-food-products in a multitude of flavors. Tuscan, Asian Fusion, Chipotle – I’m not naming off strip mall chain restaurants, these are all flavors of commercially made hummus. Hummus is so popular that farmers in North Carolina are plowing up tobacco to plant chickpeas. It’s no wonder why there is so much interest in consuming hummus. Hummus is a great snack food, (should be) healthy, and is foreign without being particularly challenging. There’s also no wonder why there is so much interest in selling hummus. That 5 dollar, 8 ounce container of hummus costs less than a dollar to make, even at home. Now that hummus is becoming a mass merchandized retail product, you may also want to start reading labels if you want it to remain a healthy snack.
Or, just make your own. It’s really easy and keeps for at least a week in the fridge. It’s natural. And best of all, it tastes like hummus. You can start with dried chickpeas, for the greatest control in the process, or with canned. The only ingredient that you might not be able to find at every grocery store is tahini. Tahini is needed and there’s not really a good substitute, so look for it in either a Mid-Eastern market or an organic food store – both will have it, but it will be cheaper at the Mid-Eastern market most likely.
You will see that many of the ingredients have a range of quantities associated with them. It depends if you are starting with dried or canned beans, and also to your taste preference. Start with the lower amount, and then adjust up by taste.
Hummus Recipe
Makes a little over 5 cups (1.2 L)

Ingredients
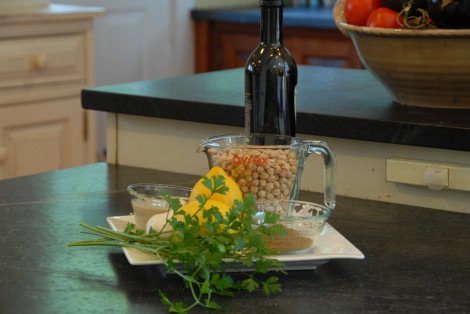
- 1 lb (450 g) dried chickpeas, or 3 15 oz cans – well drained
- 2-3 lemons
- 3-4 garlic cloves peeled
- 1/2 (120 ml) olive oil, plus a bit more for finishing
- 1/2 cup (120 ml) tahini, a sesame seed butter available at Mid-Eastern markets
- 2 tsp (10 ml) cumin, optional
- 2-3 tsp (10-15 ml) Kosher salt
- 2 tsp (10 ml) black pepper, freshly ground
Equipment: Food processor, blender, or food mill. Hummus can be made with a potato masher as well – it will be chunkier and take a lot more work, and no one ever does it….
Procedure
If starting with dried chickpeas:
Either soak the dried beans overnight or speed soak them. To speed soak dried beans, sort and rinse the beans and them place them in a large, heavy pot. Cover with 8-10 cups of water, and bring to a full boil. Boil the dried beans for 2 minutes, and then remove from the heat and cover. Allow the beans to rest covered for 1 hour.
To cook the dried beans, return the pot of soaked beans to the stove and bring to a boil. You do not need to drain the water from the speed soaking process. Once the beans have come to a full boil, reduce to a fast simmer, and let cook for at least 2 hours. Stir occasionally, and add water as needed to keep the water level above the beans. Beginning at 2 hours, test beans for doneness. The skins should be starting to shed, and there should be no crunch or bite to the bean at all. It should mash with a spoon. Once done, remove from the heat and allow the beans to cool enough to handle. Make sure to reserve about a cup of the cooking water.
Optional Step: If you want the absolute smoothest possible hummus, and you are starting with dried beans, here’s the trick. You have to skin the beans. Yes. All of them. Once the beans are cool enough to handle, pick up the beans and pop them out of their skins, placing the beans in a clean bowl. Sometimes you can rub them between your hands by the handful, and shed the skins in bulk. It doesn’t take as long as it sounds like it would. The more skins you get out of there, the smoother your hummus will be – so if you don’t mind a little texture skip this step, or just scoop out all of the loose skins from the pot.
Alternatively, you could use a food mill to process the chickpeas, and also get a very smooth result. If using a food mill, just run the chickpeas through the finer grate and then mix the other ingredients in, pressing the garlic first. I do find with a food mill that the skins tend to clog up the works, and I have to work it backwards every few turns to keep the process going.
Continue on below as if you were using canned chickpeas.
If you are using canned chickpeas
I’ve never tried skinning canned chickpeas. I don’t know if it would work or not, but I don’t see why it wouldn’t. Usually, if I’m using canned beans I’m in a hurry, and just want to get the hummus done. If you try, post a comment and let me know. (I may try this and update the post in the future.)
Add the oil, garlic, tahini, and 1 tsp (5 ml) kosher salt to the food processor or blender. Pulse until the garlic is finely chopped.
Add the chickpeas and the juice of 1 1/2 lemons to the processor. Process until the chickpeas form a paste, about 30-45 seconds Add a little of the reserved cooking water, or tap water if using canned beans, and pulse until the texture of the hummus begins to loosen up. Add the pepper and cumin (if using) and process for a few seconds.
Taste the hummus. It’s hard to give a fixed ingredient list, because canned beans will have some salt in them. For dried beans, you will most likely need at least another teaspoon (5 ml) of salt, perhaps more. Add it in slowly, tasting as you go. I also like my hummus pretty lemony, so I will add some more lemon juice at this point, up to another lemon depending on how large and juicy the lemons are. If you are happy with the acidity of the hummus, but it’s too stiff or paste like, add a little water and process it – a tablespoon (15 ml) or so at a time – until you are happy with the consistency.
