
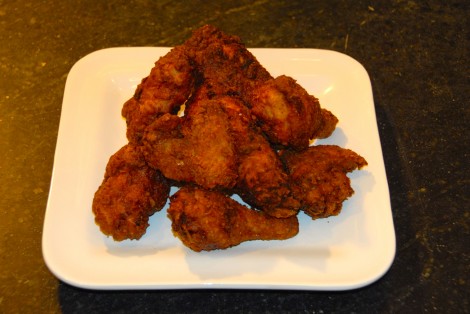
Fried chicken is a great travel food.
Fried chicken used to be a common weekly dish in American homes, but is one that you see less and less often. Given the continued success of fast food chains, I would argue that it’s not disappearing because of health concerns, but rather because people think that it’s too difficult or messy to make at home.
And, here I am telling you it’s a great travel food. Why? Well, as a food that travels it is hard to beat fried chicken. It has always been a picnic basket favorite; it is just as good cold or room temperature as it is piping hot. It rewarms well – just 10 or 15 minutes in a hot oven or toaster oven will reheat and re-crisp fried chicken. And, it’s fried chicken — the bacon of the poultry world, salty and crispy and great with everything.
Frying chicken while traveling isn’t such a stretch either. All you really need to fry chicken is a chicken, some flour, salt and pepper, and a skillet with an inch of oil in it; that’s all. You can always do more, such as brining, battering, and additional seasonings — but you don’t have to. It can be as simple as you want to make it, and still turn out great. After all, it is fried chicken.
There are numerous ways to fry chicken, and even more ways to season and batter it. I’m going to present a moderately complex version, because I find that if you have the time and ingredients the extra step of brining the chicken is worth it. Brining adds moisture and flavor to the chicken, and carries it deep into the meat so that each whole bite is full of flavor, not just the crust. However, I know that neither of my grandmothers ever brined a bird. Maybe a couple of hour soak in buttermilk, but that would be about it. Why the difference?
Some of the conflict between traditions of cooking versus modern methods are due to the way that the ingredients have changed over a few generations. Three or four generations ago, chickens were fed different feed or allowed to forage and buttermilk was actually the liquid left over from making butter. Now chickens are selected and bred for size and feed on corn, and buttermilk is more akin to yogurt than a byproduct of butter making. The ingredients change, and holding to tradition for tradition’s sake doesn’t improve the finished product.
I’ve tried soaking chickens in buttermilk and onions, and found it added much less in flavor than a standard brine. However, I do like the buttermilk flavor, so I use it as a stage in the coating process. That way I can build up a nice coating on the chicken, and keep the buttermilk flavor in the crust. Keep in mind though, that a simple dusting with flour seasoned with salt and pepper and 15 minutes in a skillet are all that are really required to turn out a plate of crispy, juicy fried chicken.
Skillet Fried Chicken
Serves 4 polite and selfless people. (Maybe you should double it, leftovers – if they happen – are great)
Ingredients
- 1 Chicken, 2 1/2 – 3 lbs (1.1 -1.5 Kg) , see note
Note on chicken size: Fryers are supposed to be smaller birds, however in many markets the chickens sold as fryers are weighing in at 3.5-4 Lbs (1.8 Kg) or more. While you can fry any chicken, smaller birds work better as the inside gets cooked before the outside gets burned. If you can only get larger birds, cut the bird into 10 pieces rather than 8 by cutting each breast in half.
Brine (for one to two 3 pound chickens)
- 3 quarts (3 L) water
- 1 cup (240 ml) kosher salt
- 3 Tbs (45 ml) sugar
- 2 Tbs (30 ml) peppercorns
- 2 bay leaves
- 2 lemons, cut into 1/8 lemon chunks
- 3-4 cloves garlic, crushed with the heel of your hand
- 1 1/2 tsp (7.5 ml) dried rosemary
- 1 1/2 tsp (7.5 ml) dried thyme
Coating (for one 3 pound chicken – multiply by 1.5 for two)
- 2 cups (480 ml) flour
- 2 tsp (10 ml) salt
- 1 Tbs (15 ml) paprika
- 1 1/2 tsp (7.5 ml) pepper
- 1/2 tsp (2.5 ml) garlic powder (optional)
- 1/2 tsp (2.5 ml) onion powder (optional)
- 1 tsp (5 ml) cayenne pepper (optional)
- 1 – 1 1/2 cups (240-360 ml) buttermilk (or a few tablespoons plain yogurt mixed with 1 1/2 cups milk)
For Frying
- 1 1/2 quarts vegetable oil (canola, peanut, or corn)
Procedure
Make the brine first. Bring the water to a boil, and add the salt and sugar stirring until dissolved. Turn off the heat and add the remaining brine ingredients. Allow to cool to room temperature. If you are in a hurry, you could leave out 1 quart of water, and add in a quart of ice at the end.
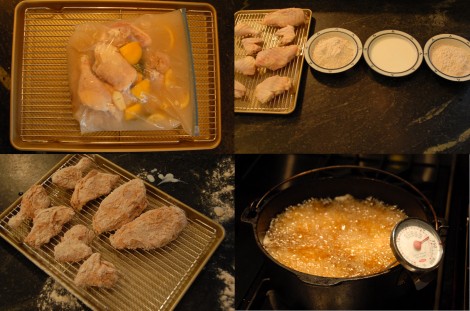
Cut the chicken into 8 pieces if the bird is under 3 pounds, or into 10 pieces if it is over 3 pounds. Place a gallon zipper bag in a large bowl, place the chicken in the bag, and fill the bag with the cooled brine. Allow to brine in the refrigerator for 8-12 hours, but don’t let it remain in the brine for longer than that or it may take up too much salt.
Remove the chicken from the brine (discarding brine) and rinse to remove loose herbs. Pat the chicken dry, and place it on a cooling rack (or a pan or plate lined with paper towels) and allow it to come to room temperature.
Mix your coating flour with the salt pepper and spices. Set up a coating area with 1/3 of the coating mixture in one bowl, the butter milk in a second bowl, and the remaining 2/3 of the coating mixture in a third bowl.
Pour enough oil into a 10 or 12 inch (25 or 30 cm) iron skillet to come 1/3 up the sides of the pan. If you don’t have a skillet with reasonably straight sides, use a dutch oven, french oven, or heavy pot instead. Never fill the pan more than about 1/3 of the way up the sides. This should be about an inch (2.5 cm) to an inch and a half (3.75 cm) of oil. For a 12″ black frying pan, this is just under 1 and 1/2 quarts (1.5 L).
Coat the room temperature chicken by dipping in the first bowl and covering with flour. Shake the piece of chicken off, and then dunk it into the buttermilk. Allow the excess to drain off, and finally coat the chicken thoroughly with flour in the third bowl. Place the chicken on a cooling rack or parchment (or wax paper, or foil) lined pan. Repeat for the remaining pieces. If you have the chicken resting on a cooling rack, allow it to dry for a few minutes before frying.
Place a deep fry thermometer on the rim of the pot, with the probe not touching the bottom. Caution: some deep fry thermometers don’t read accurately with only an inch or so of oil in the pan. Be aware of this, and don’t overheat the oil. If you see canola oil beginning to smoke, it is at or over 400 F (205 C). Turn the burner on to medium-high, and watch the thermometer. Never walk away from a pan of oil heating on the stove.
As the oil approaches 360 F (180 C) start adding chicken pieces, one piece at a time. Allow the bubbling and frothing to subside some before adding another piece. Do not overlap or crowd the pieces. For a 12″ (30 cm) skillet I generally do two batches, all the smaller pieces first, and then the breasts.
The oil temp will decrease as you add the chicken. Adjust the burner to maintain around 320-330 F (160-165 C). You can place a lid partially on the pan to help with heat control and to control splashing, but don’t cover it completely – you want to be able to see what’s going on in there.
After 6-7 minutes turn the chicken over. After a further 6-7 minutes look to see if the chicken is uniformly dark golden brown to dark brown, and the rate of bubbling has decreased a bit. If so, remove a larger piece from the pan and test it with an instant read thermometer. For the dark meat pieces you are looking for an internal temperature of 175 F (79 C) degrees. Once you reach that temperature, remove all of the chicken pieces.
Allow the oil to return to 360 F (180 C) add the remaining pieces, and cook as above – perhaps another minute per side for the breasts. The internal temperature for the breasts is ideally a bit lower, so remove them at 165 F (74 C). These will coast a little bit higher in temperature once removed, but not as much as a whole chicken because the pieces have a smaller mass.
Allow to cool and rest for 15 minutes before consuming. Repeat as desired.
By the way, things that go great with fried chicken include:
Here is a video of the process —